
Waterproofing Bathrooms: Methods, Membranes, and Building Code Compliance
Tile may be the visible finish in a bathroom, but it is not what keeps water out. In multifamily buildings, waterproofing is infrastructure. A single plumbing leak can move through slabs, service chases, and wall cavities, affecting neighbors, triggering insurance claims, and in regulated markets even leading to hearings with the Department of Buildings. For apartments in dense buildings, waterproofing must be treated as a mechanical system that is specified, installed, tested, and documented with the same discipline as electrical or HVAC work.
Understanding this mindset is the first step toward building bathrooms that last.
Why Risk Is Higher in Shared Structures
In a detached house, a leak is usually contained within the property. In a multifamily building, water follows gravity and structural pathways. It can migrate laterally along slabs, drop through penetrations, and appear several units away from its source. Older risers, uneven concrete, previous renovations, and unsealed legacy penetrations increase that risk.
Even in new high-rise construction, a small installation mistake such as an incomplete seam or an improperly clamped drain can create a failure that is invisible at first. By the time staining appears below, remediation is far more complex than the original installation would have been. That is why waterproofing in apartments must be defined clearly at design stage and verified during construction.
Understanding the Layered Assembly
A properly built wet room is not a single product. It is a layered system where each component depends on the others. The visible tile and grout are only the surface. Beneath them should be:
- A sound structural slab or approved subfloor
- A correctly sloped mortar bed where required
- A continuous waterproof membrane
- A compatible drain assembly
- Reinforced seams and penetrations
- Properly installed movement joints
When one layer is weak, water exploits it. Many failures occur because the membrane was treated as an accessory rather than the core of the system. Successful teams design the entire assembly from substrate to drain and verify compatibility between all components.
Liquid Versus Sheet Membranes
Both liquid-applied membranes and sheet membranes perform well when installed correctly. The choice depends on the geometry of the space, the condition of the substrate, and the experience of the installer.
Liquid membranes are useful in irregular spaces because they conform easily to corners and transitions. However, they require precise thickness. Too thin and the system develops pinholes or weak spots. Reinforcement at changes of plane is critical. Cure times must also be respected before proceeding to the next layer.
Sheet membranes offer factory-controlled thickness and predictable consistency. When bonded properly to a prepared substrate, they create uniform coverage. Their performance depends heavily on correct seam treatment and proper integration with the drain. Poor bonding or rushed seam work undermines their reliability.
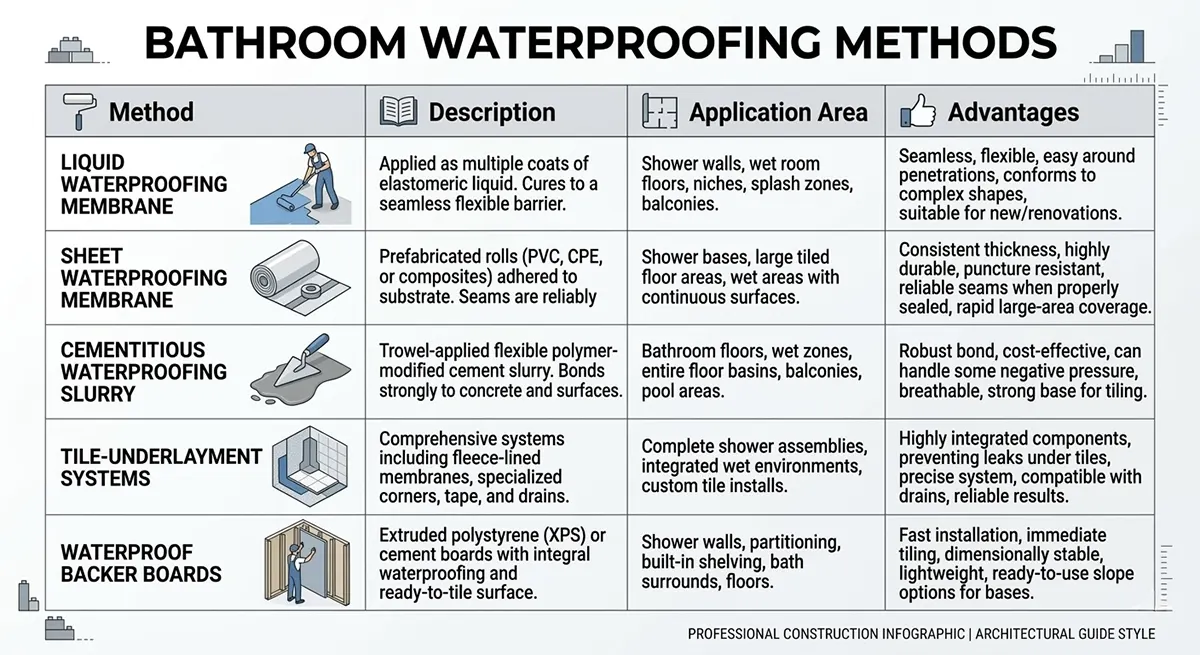
The safest approach is to use a complete, manufacturer-approved system. Membrane, drain, sealants, and accessories should be designed to work together. Mixing unrelated components increases risk and complicates inspections.
The Shower Pan: Where Most Failures Begin
Shower pans concentrate water and movement, which makes them the most common source of disputes. A correct installation begins with a clean, stable substrate. If a mortar bed is used, it must be pitched at least a quarter inch per foot toward the drain so that water does not collect beneath the tile.
The membrane must extend continuously across the pan and turn up the surrounding walls above the finished curb height. At the drain, it must be secured with the appropriate clamping or bonding method specific to that system. Once installed, the pan should be flood tested before tile is applied. This step is often rushed or omitted, but it is the only way to confirm integrity before the assembly is concealed.
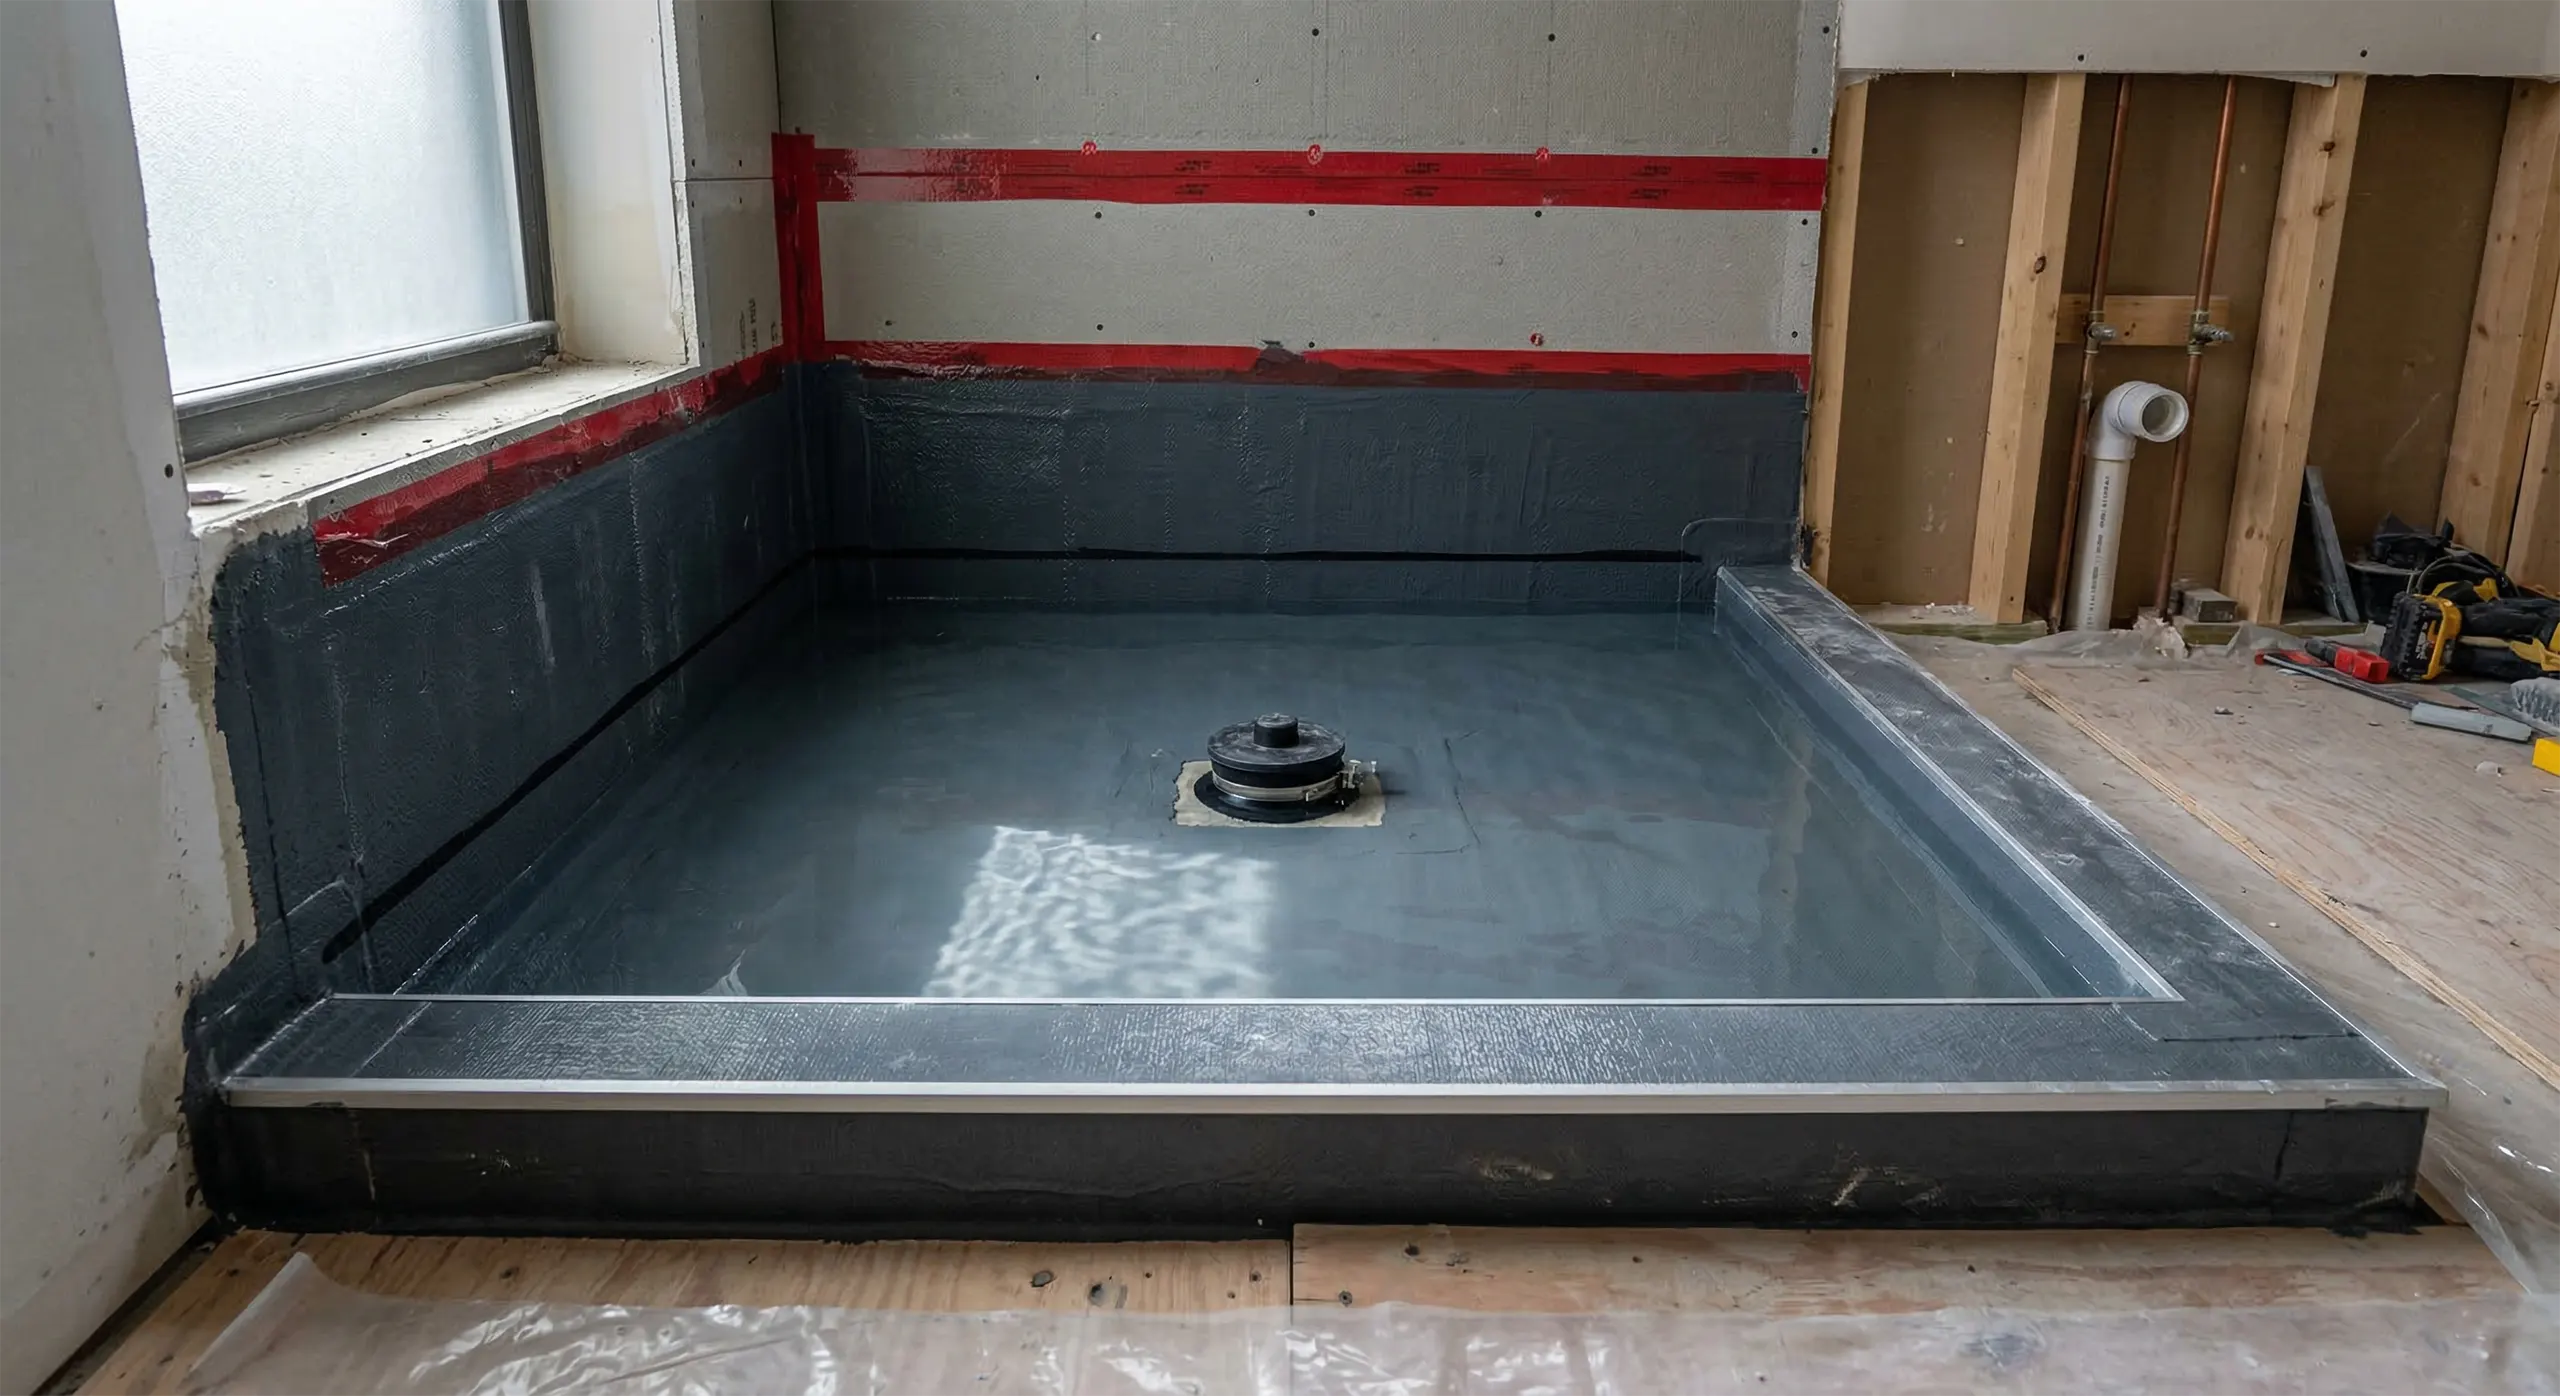
Skipping the pre-slope, using an incompatible drain, or failing to test the pan are predictable causes of hidden leaks. These shortcuts save little time but create significant long-term liability.
Substrate Preparation Is Not Optional
Membranes bond only as well as the surface beneath them. Cracked concrete, surface contaminants, uneven floors, or poorly fastened backer boards compromise adhesion. Concrete should be mechanically cleaned and, if required, primed according to the membrane manufacturer’s instructions. Cementitious backer units or approved tile backer boards must be used in wet zones. Standard moisture-resistant drywall is not sufficient inside shower enclosures.
Moisture testing of slabs and subfloors is also important. Excess moisture beneath a membrane can affect bonding and long-term durability. Results should be compared against the manufacturer’s published limits before proceeding.
Penetrations and Transitions Are Critical
Most leaks do not occur across large open areas of tile. They occur at small details such as pipe penetrations, mixing valve openings, lighting entries, thresholds, and movement joints. Each penetration must be reinforced and sealed as part of the membrane system. Seams must be continuous and properly bonded. The membrane should extend to logical termination points such as door thresholds and curbs without interruption.
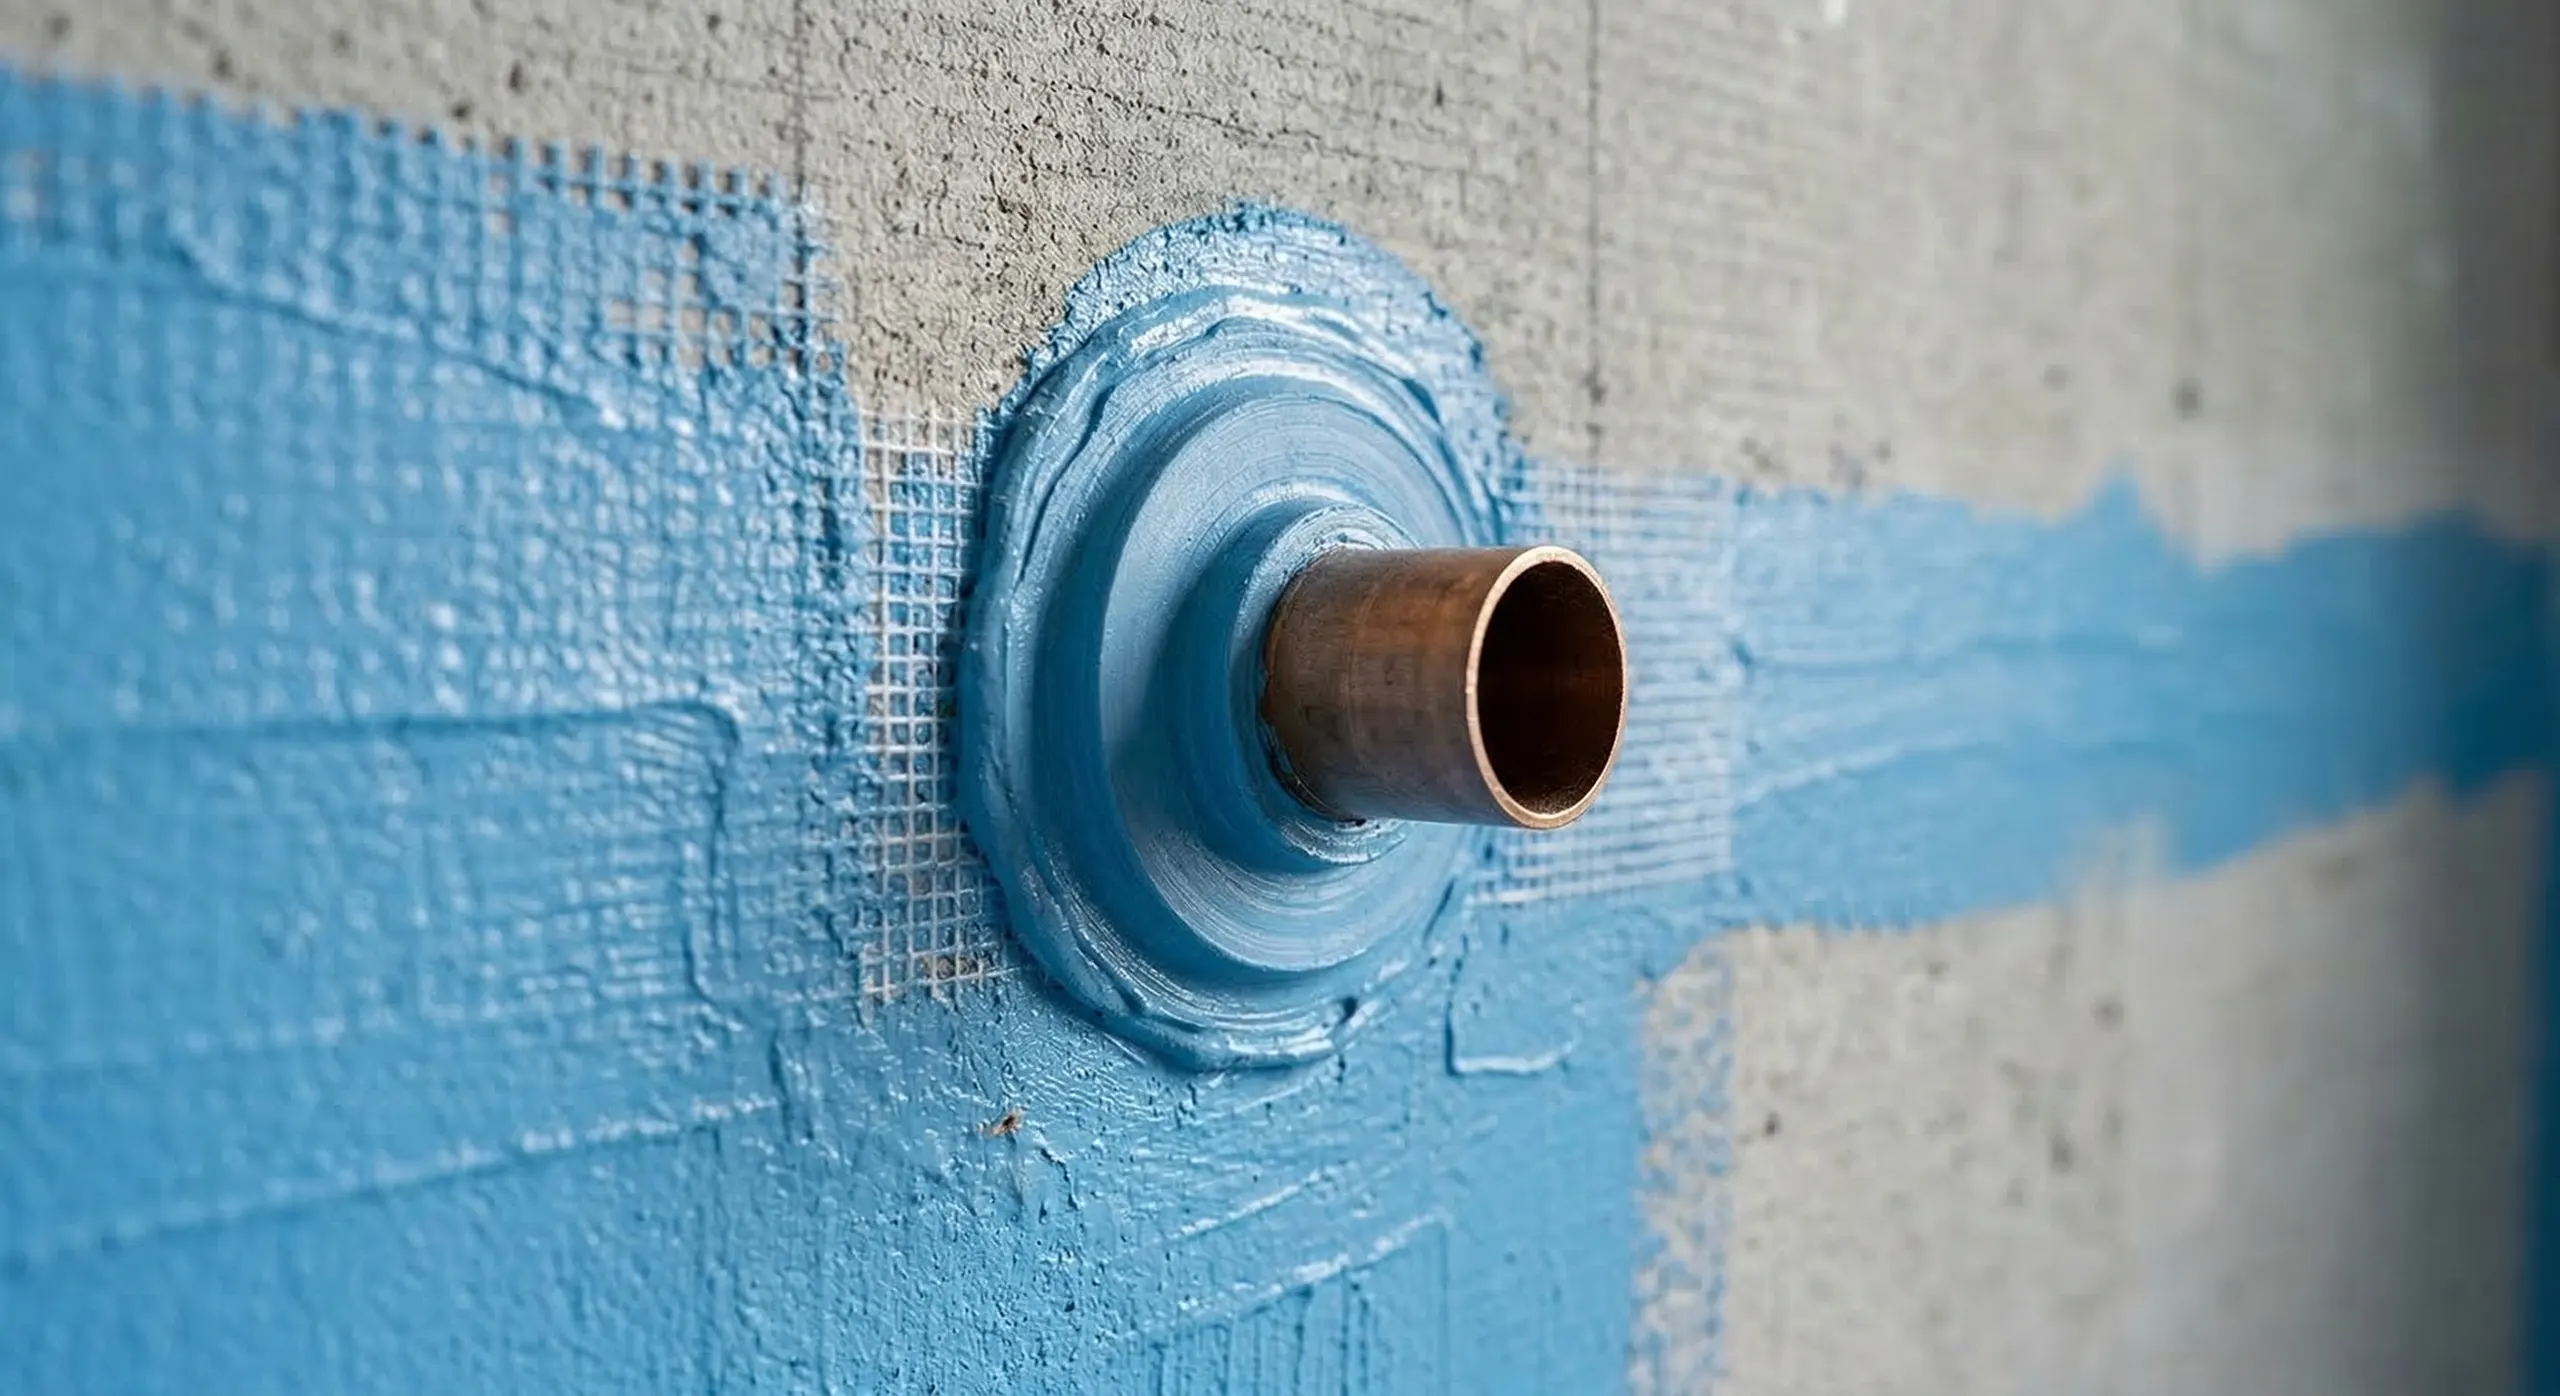
Movement joints are equally important. Large tile installations require properly placed expansion joints to prevent cracking and stress transfer to the membrane. Ignoring these details compromises the entire system.
Testing and Documentation
In regulated markets, installation quality must be documented. Flood testing the shower pan for the duration required by local code or by the manufacturer is essential. The test should be recorded, with dated photographs or video and written confirmation of water level before and after the test period.
Maintain a project file that includes:
- Membrane data sheets and drain specifications
- Batch numbers and installation instructions
- Licensed contractor documentation and required affidavits
These records streamline inspections and protect owners in the event of disputes or insurance claims.
Common Failure Patterns
Most waterproofing failures are not mysterious. They result from:
- Insufficient membrane thickness
- Lack of reinforcement at corners
- Flat pans that allow ponding
- Incompatible products
- Missing flood tests
Prevention is straightforward: follow manufacturer coverage requirements, construct a proper slope, use a compatible drain system, reinforce every transition, and test before finishing. These measures add modest cost during construction but prevent expensive remediation later, particularly in multifamily buildings where damage may extend beyond one unit.
Cost Versus Risk
Waterproofing represents a relatively small portion of a bathroom renovation budget, yet it carries disproportionate consequences if done poorly. Investing in a proven membrane system, compatible drain assembly, and documented testing protocol is financially rational. Cutting corners in this category often leads to repair costs that exceed the original savings many times over.

A Practical Mindset
Before demolition begins, confirm the exact membrane system, drain model, and testing protocol. During construction, document substrate preparation and membrane installation. At completion, archive flood test records and product documentation. These steps are not administrative burdens; they are part of responsible construction practice in shared buildings.
In multifamily environments, waterproofing is not about appearance. It is about protecting structure, neighbors, and long-term value. When treated as infrastructure rather than decoration, it becomes one of the most important investments in the entire renovation.


Soundproofing Apartments: Real Technical Solutions That Work
Living in a building with shared slabs and party walls means accepting that sound travels in ways it

Countertop Installation in High-Rise Buildings: Technical Considerations
Installing a heavy stone slab in a 30th floor Manhattan kitchen has very little in common with deliv

Bathroom Renovation in Manhattan and New York City: What Actually Matters
Bathroom renovation in Manhattan is rarely simple. It is not just a matter of choosing tile and repl